Blueberry yogurt scones are tender and delicious scones that are perfect to eat any time of day. This blueberry scone recipe has blueberries and yogurt and the two combined are the perfect flavor combination and really tender scones.
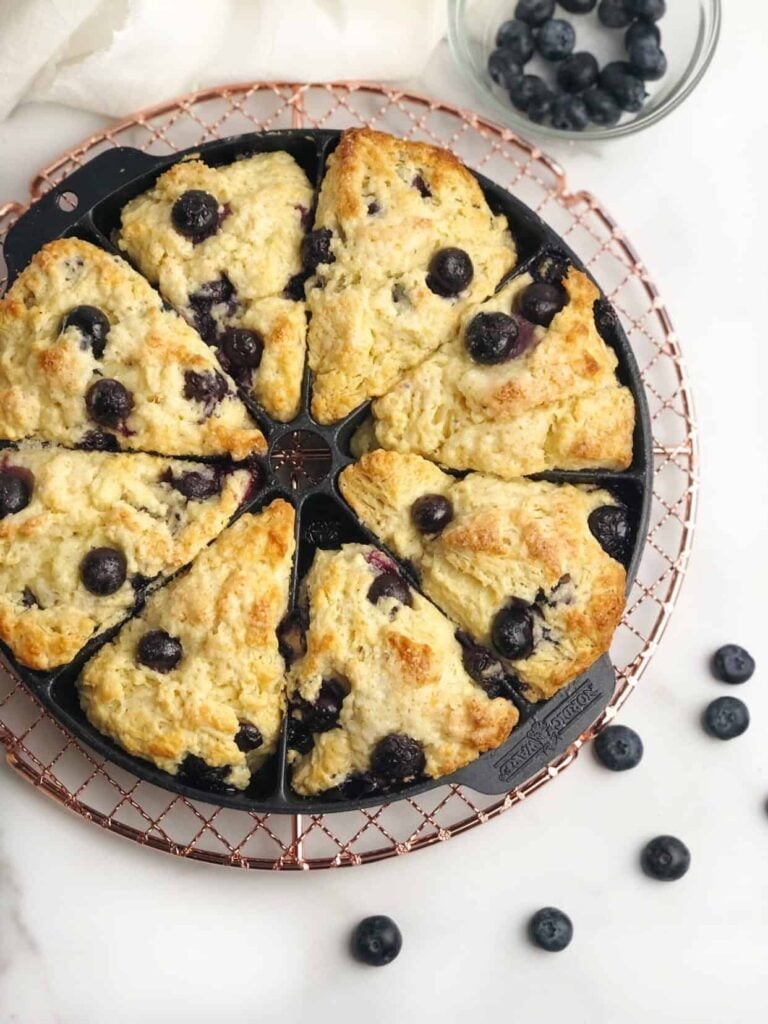
Making scones with yogurt is one of my favorite ways to make scones. It keeps the scones tender and it creates a wonderful background flavor that pairs so well with fruit. Blueberries are just one of my favorite fruits so I add them to scones and even make a blueberry breakfast cake with them.
This recipe is so easy to make and similar to making American biscuits (building those layers). If you are new to making scones, the key is to keep your butter cold (like making biscuits) and not to overwork your dough.
These easy-to-make blueberry scones are great for breakfast, as a snack, or as a dessert and go so well with coffee and tea. They also freeze well so you can make a whole batch and freeze some for later!

Ingredients Needed
There are just a few simple ingredients you need to make these scones.
- Fresh Blueberries: Fresh blueberries work best for this recipe.
- Yogurt. This adds moisture to the scones. You can use regular yogurt or Greek yogurt.
- All Purpose Flour: The base for the scone dough.
- Unsalted butter: I prefer this when baking so I can control how much salt is in the recipe.
- Egg: Large eggs work best.
- Granulated sugar: This sweetens the scones and gives the dough structure..
- Baking powder: Baking powder helps give lift and rise to the scones.
- Kosher salt: Salt helps you taste the flavors.
- Vanilla extract: Try to use the best quality you can find.
- Milk: Whole milk is best. It adds moisture to the scones.
How to make blueberry yogurt scones
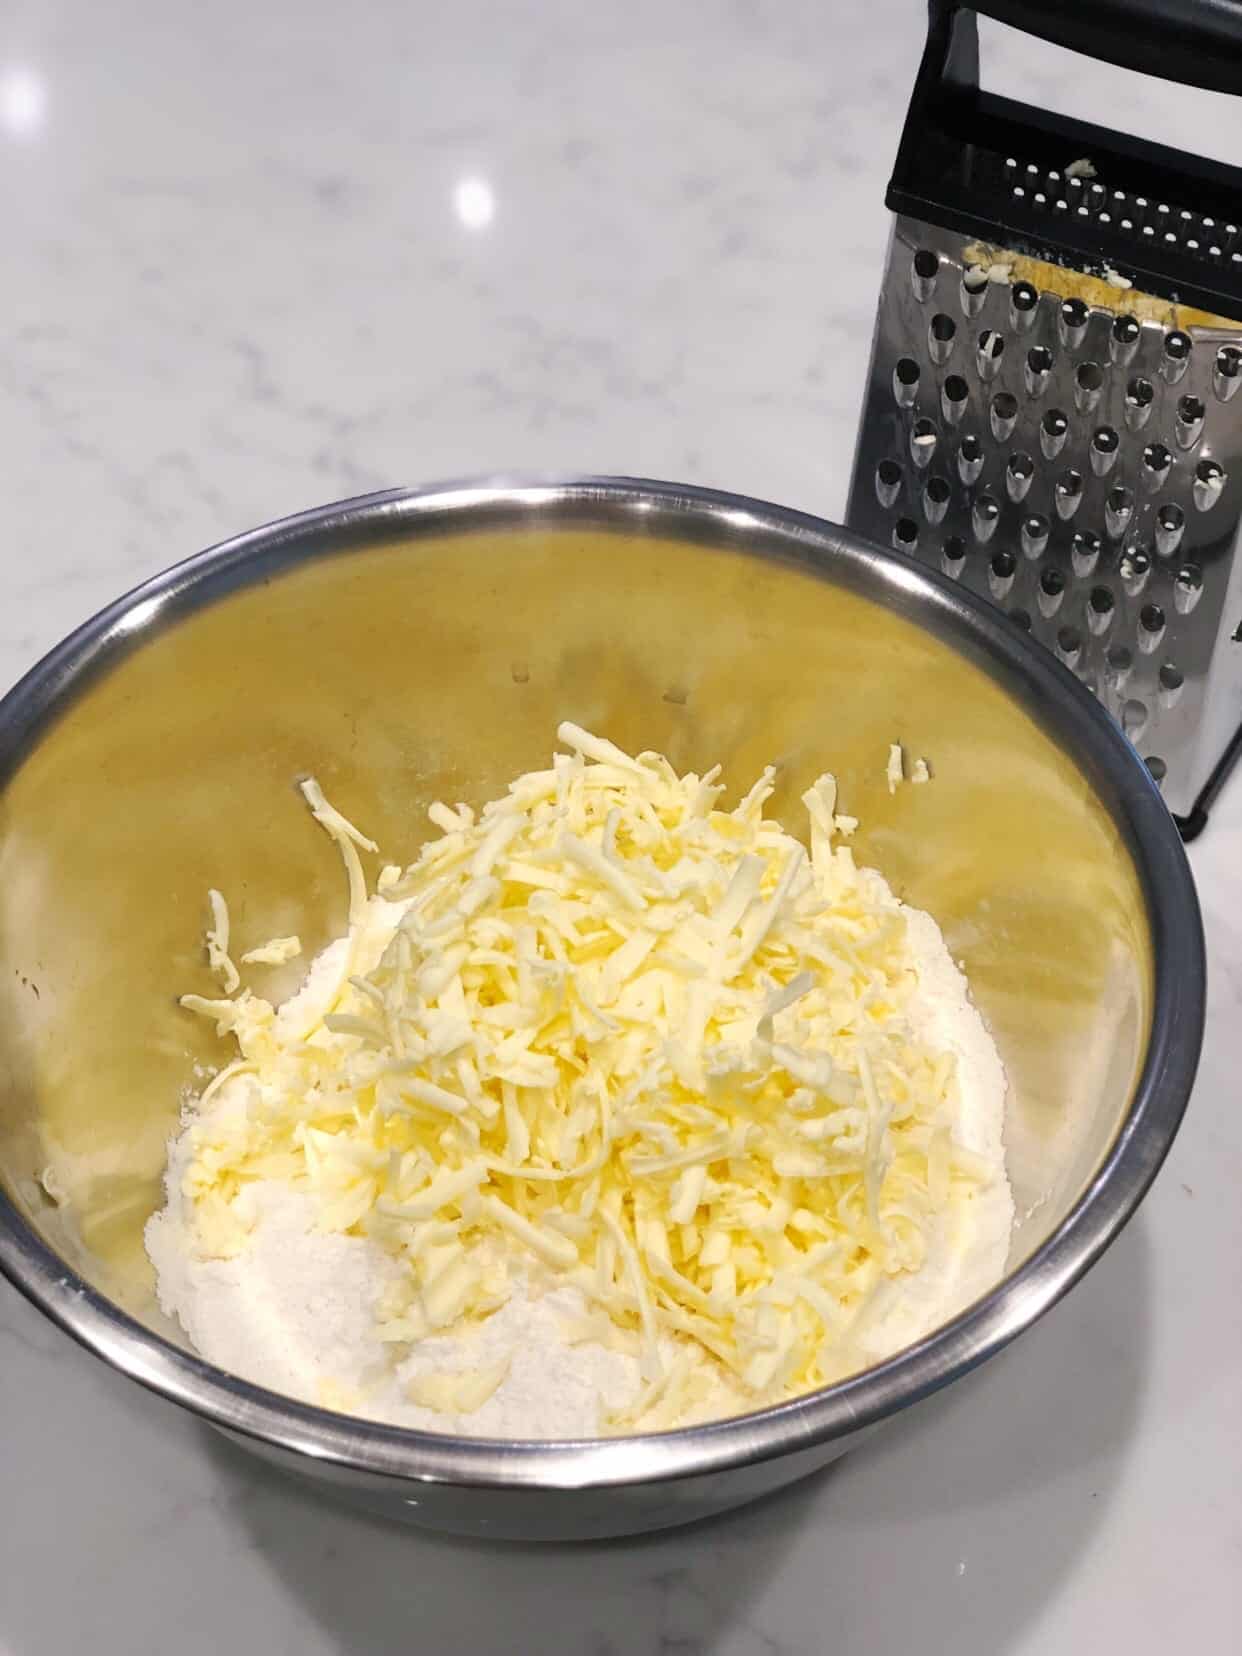
- To make these blueberry scones with yogurt, the first thing you want to do is add your dry ingredients into a bowl then add the shredded cold butter to this and mix it together. This is what helps create those flaky layers.
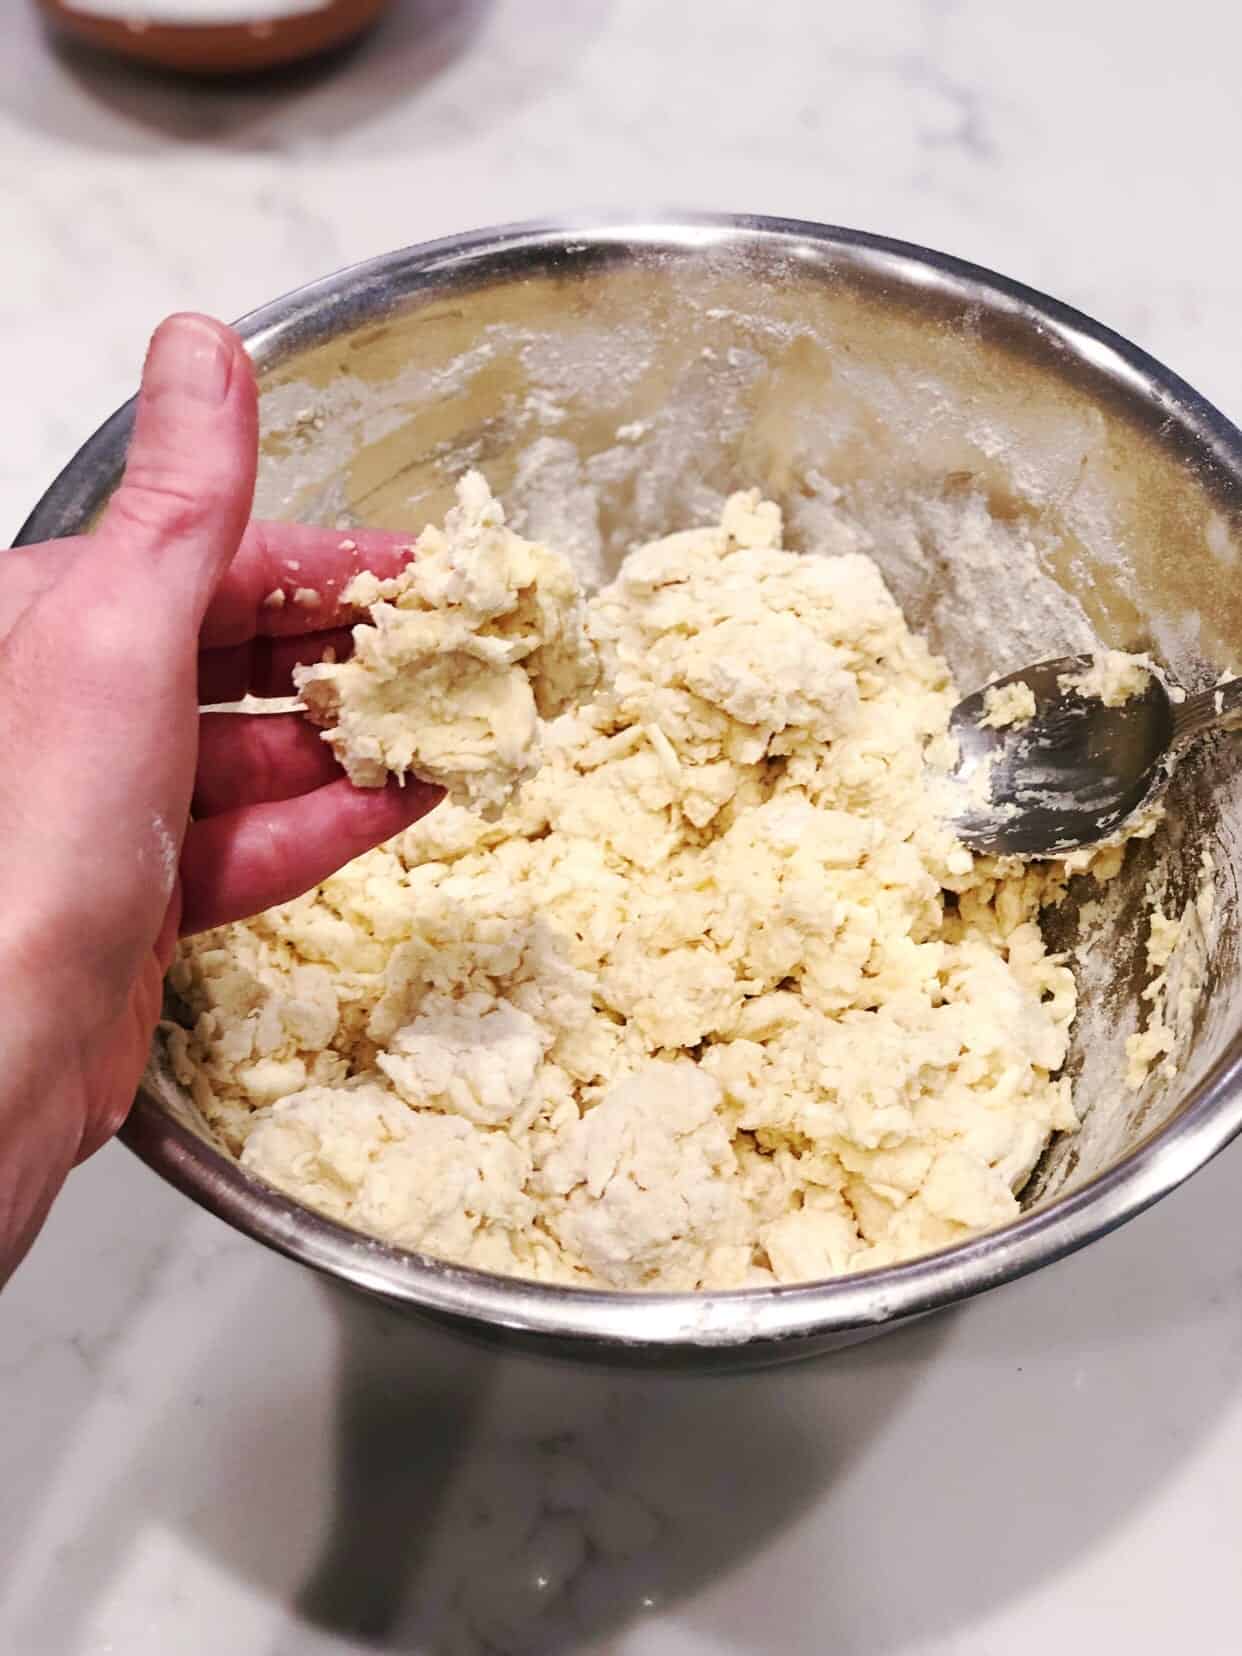
- Once you have done that, you mix the wet ingredients together in a separate bowl. Then you will combine the two until you have a very shaggy-looking dough like in the picture below.

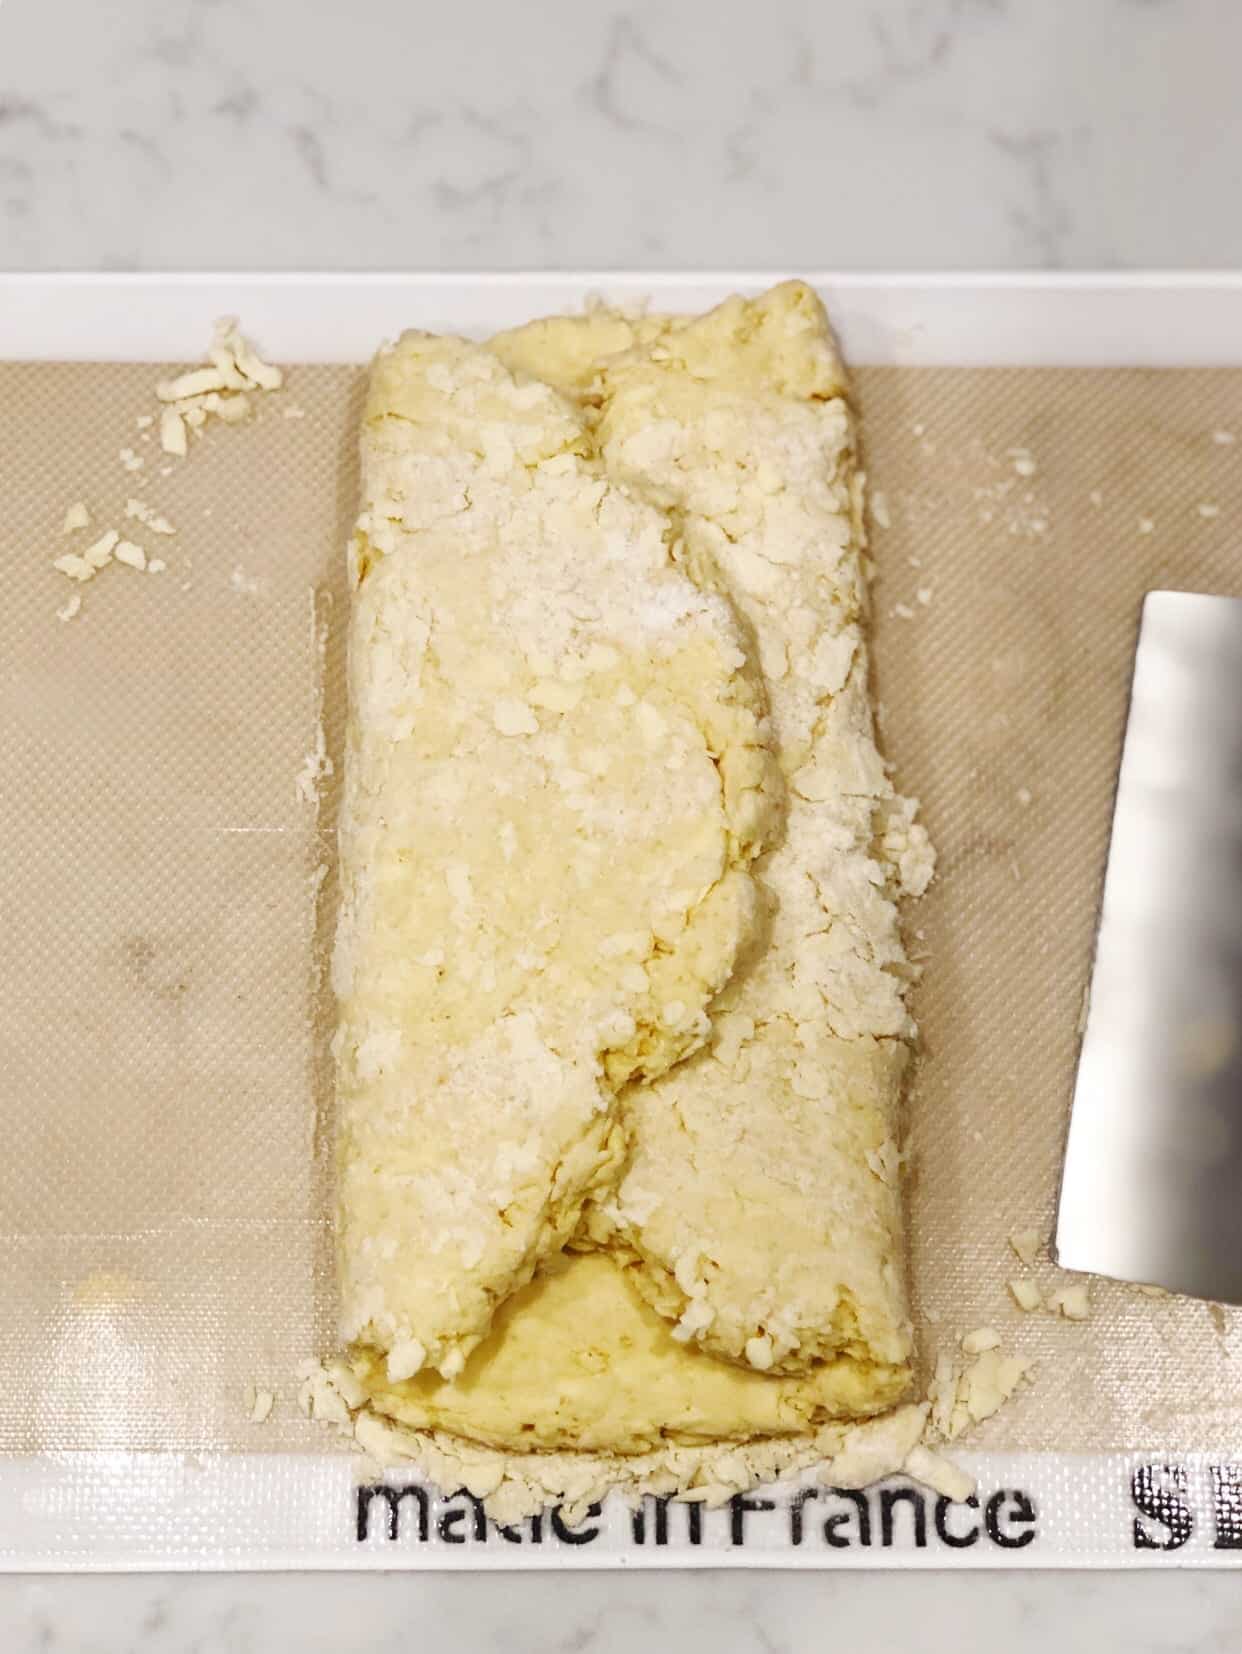
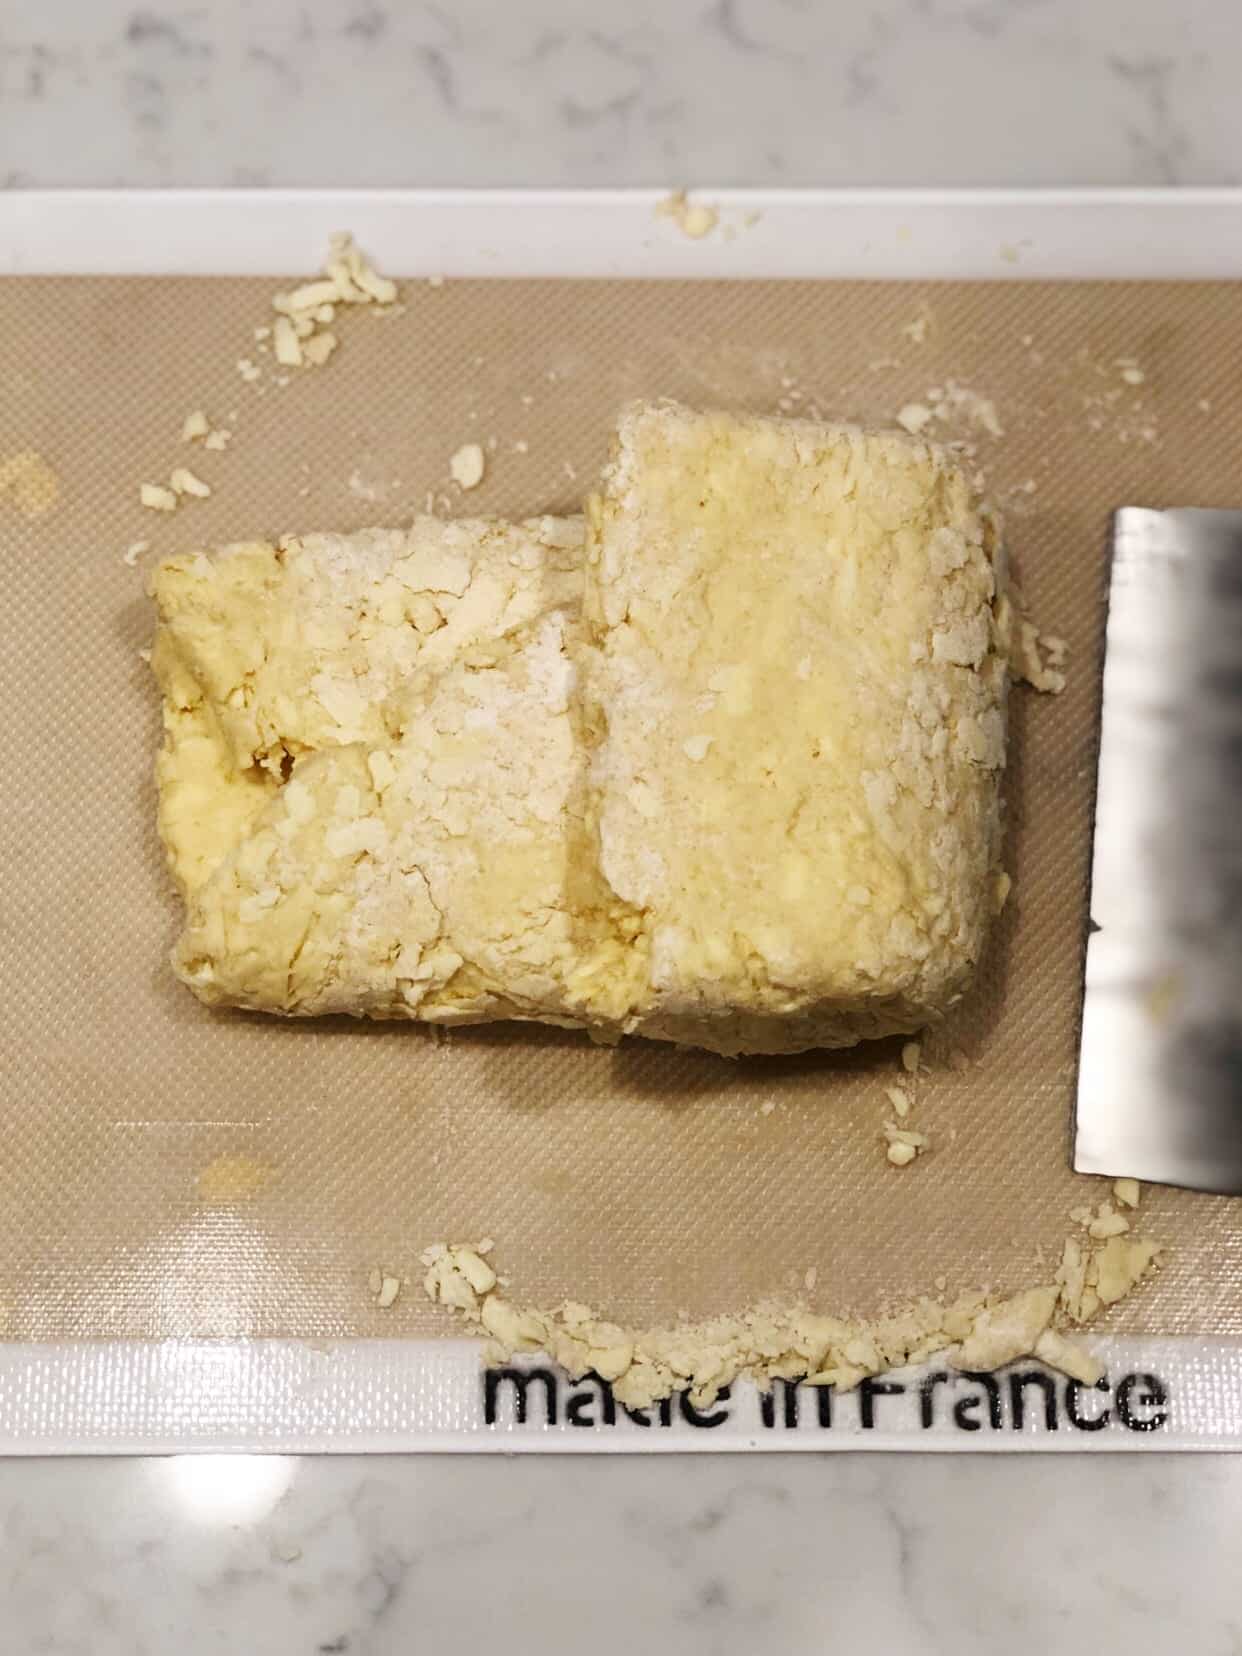
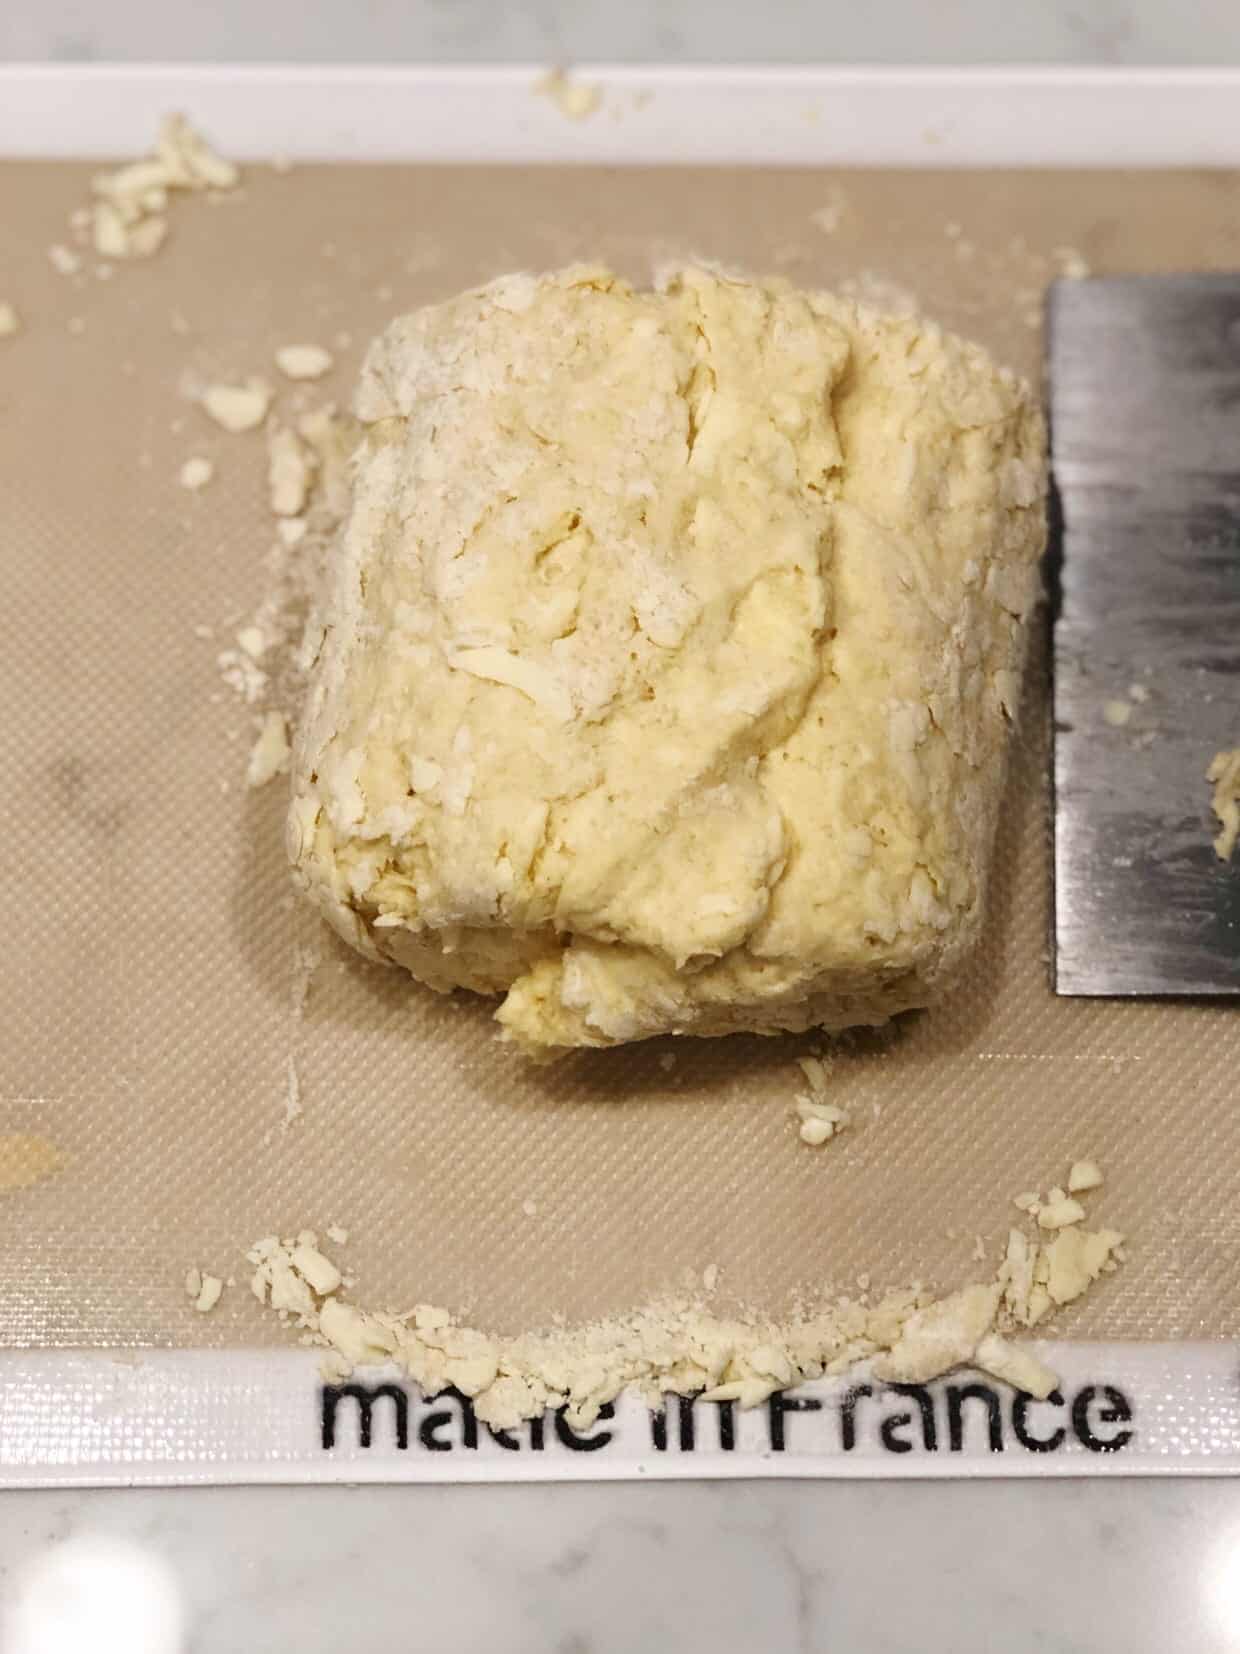
- To really help get those flaky layers we all love in our scones, you will fold the scone dough a few times. It is similar to making biscuits 🙂
- Once you have folded the scone dough you will add this to the fridge to get cold again. We didn't forget the blueberries in this blueberry scone recipe. They will be added after the dough chills.
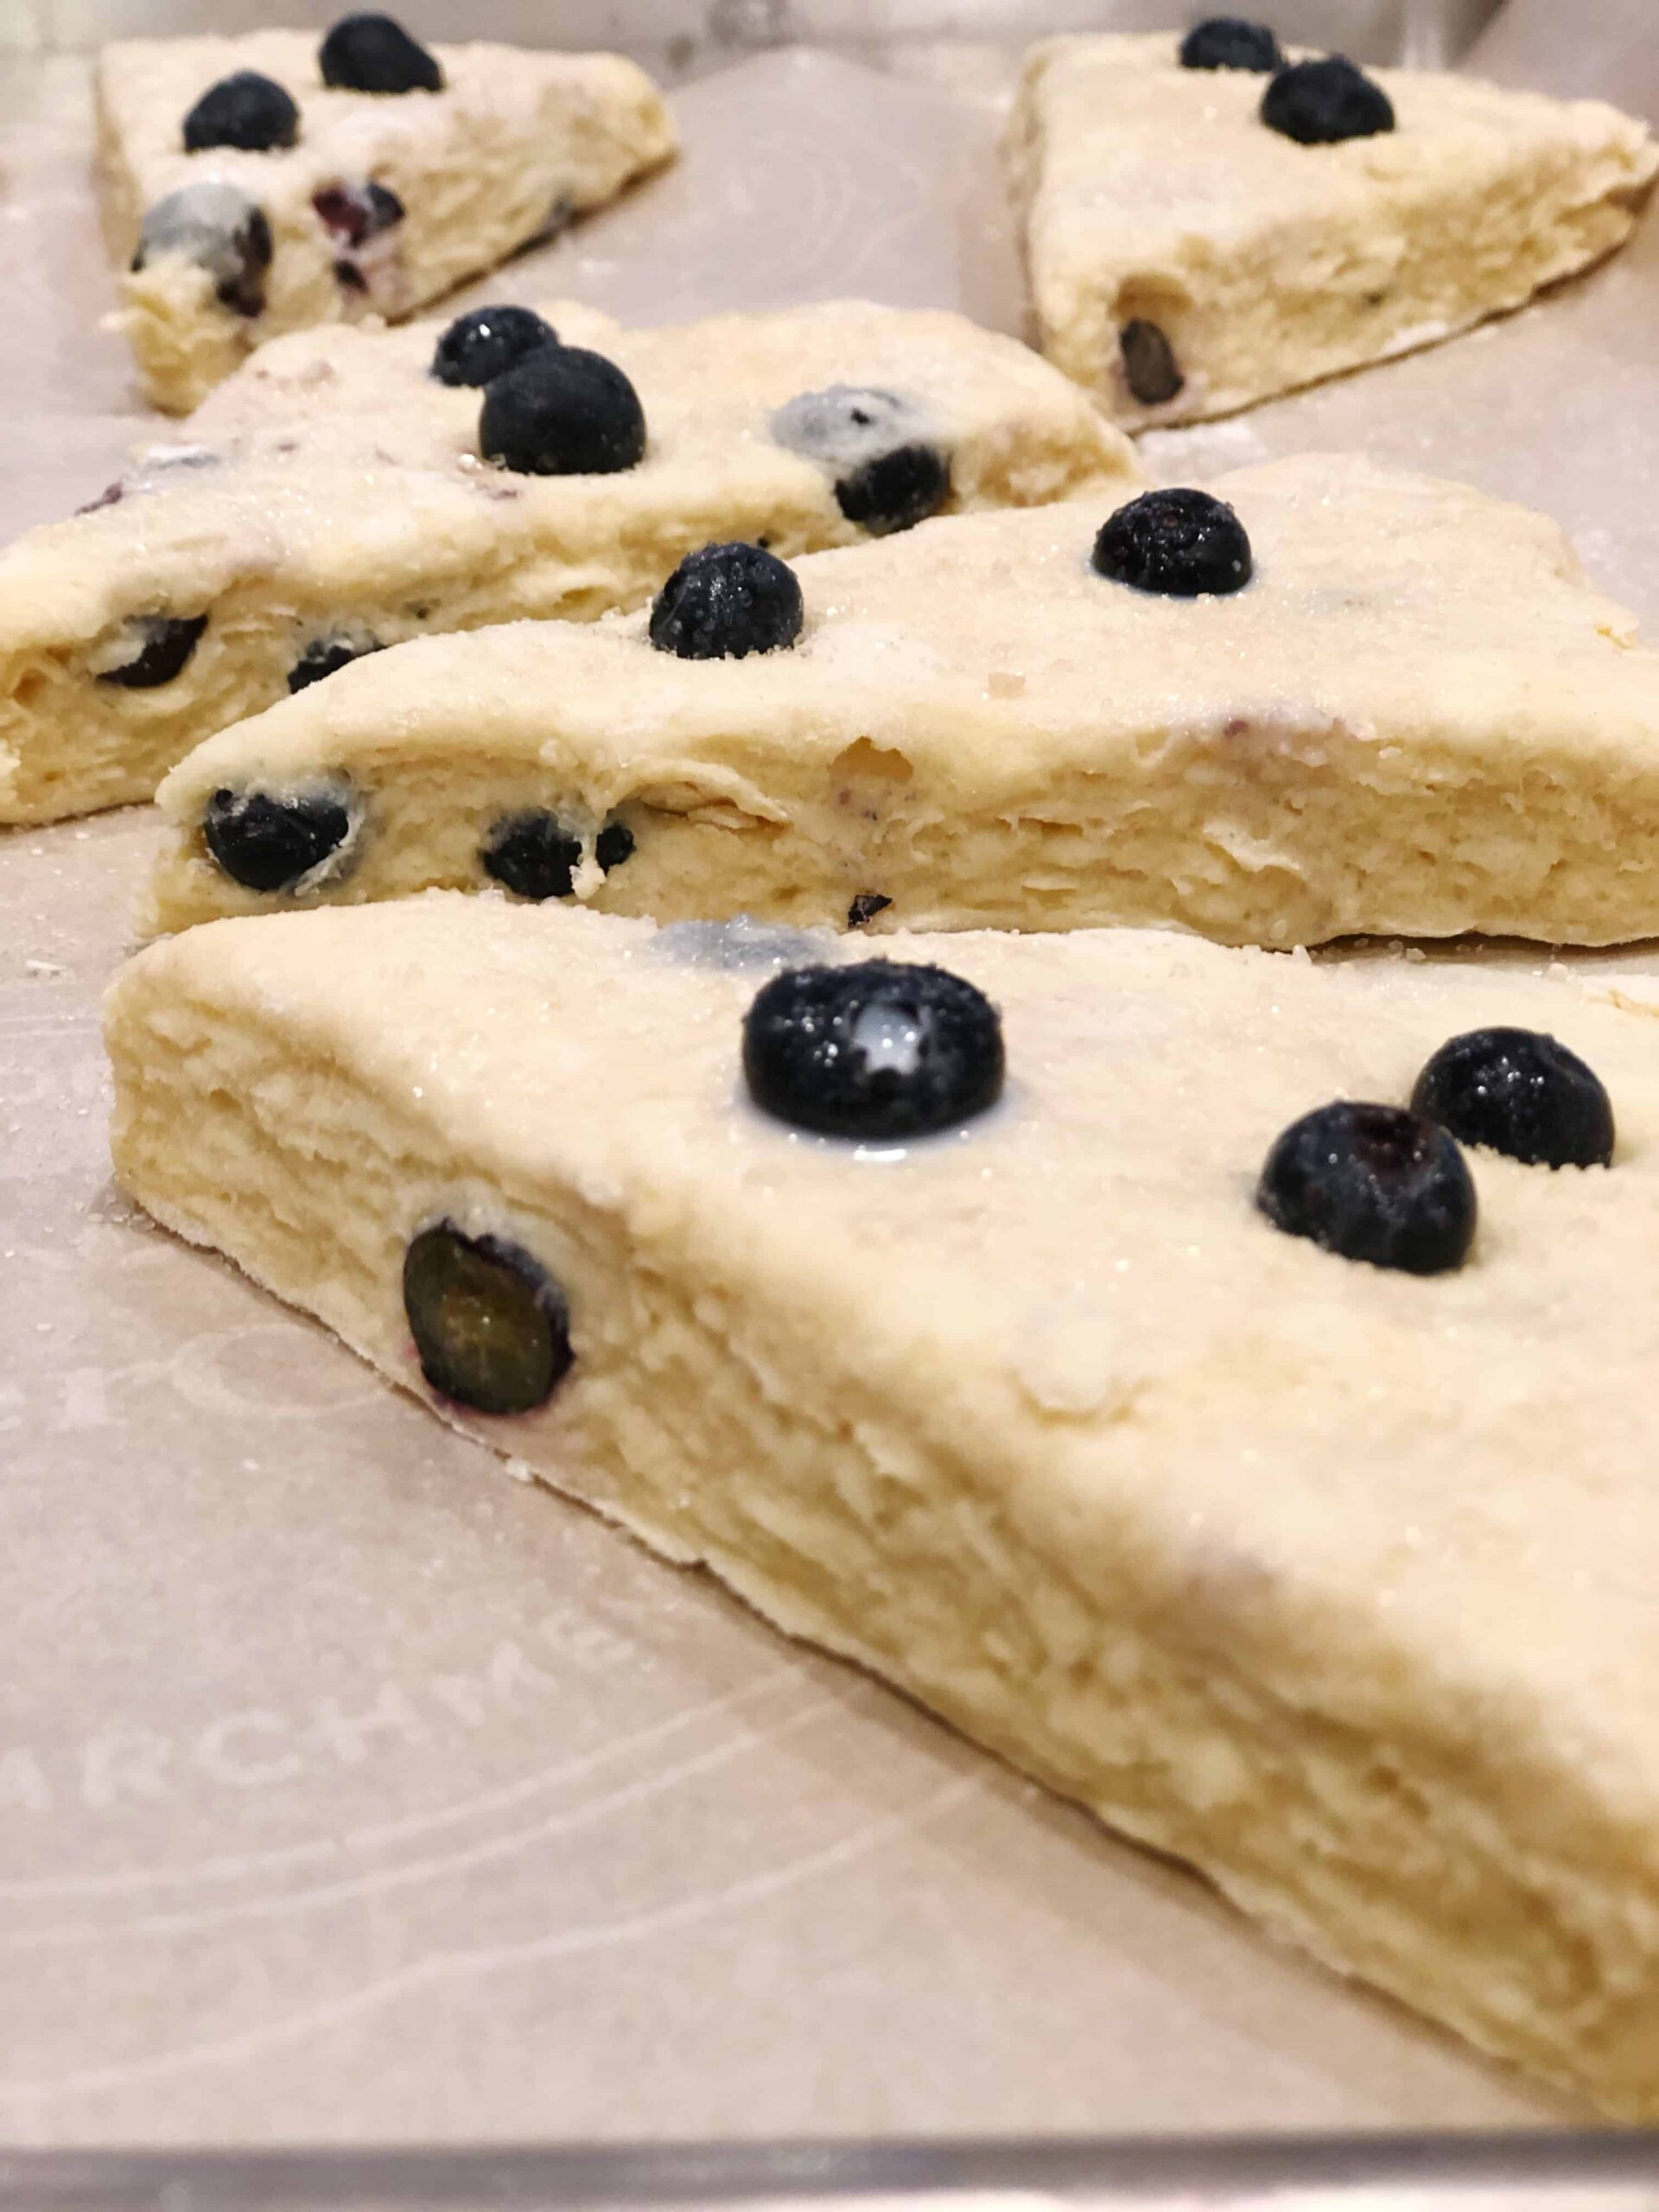
- When you add the blueberries, you will gently fold them into the dough and then add some more blueberries on the top before baking. If you have had problems with blueberries getting mashed up in the dough, this step will help with that.

Scone making tips
- You can use any fruit you like or have on hand with this recipe or even substitute chocolate chips for the fruit. If you like plain scones then you can leave that out altogether and they will taste just as great. One thing that you should not skip is the yogurt part.
- You do not want to overwork your dough so leaving it more shaggy is great. Just think about it as being a lazy baker.
- Try to use very little additional flour when shaping and rolling the dough. I like to use a non-stick Silpat and it allows me to use less flour when I shape my dough on it.
Storing
If you do not eat all of the blueberry yogurt scones on the first day, just cover them with plastic wrap or place them in an air-tight container on the counter for up to 2 days.
More Scone Recipes
If you like these blueberry yogurt scones and want more scones to try at home then you may like:


Blueberry and Yogurt Scones
Ingredients
- 2 ¼ cups all-purpose flour
- 12 tablespoons unsalted butter cold Shredded on the coarse side of a cheese grater. You can also cut your butter into ½ inch pieces.
- ½ pint of blueberries
- ½ cup yogurt good quality regular yogurt or greek yogurt.
- 1 large egg
- 2 tablespoons sugar plus more for sprinkling on scones
- 1 tablespoon baking powder
- ½ teaspoon kosher salt
- 1 teaspoon pure vanilla extract
- 2 tablespoon milk
- ⅛ cup Heavy cream or milk for brushing on scones
Instructions
- Pre-heat your oven to 400 degrees
- In a large bowl add your flour, salt, sugar and baking powder.2 ¼ cups all-purpose flour, 2 tablespoons sugar , ½ teaspoon kosher salt, 1 tablespoon baking powder
- If Shredding Your Butter:Shred your cold butter on course side of your cheese grater.If using cubed butter:Using a pastry cutter (two forks or a food processor), cut in the butter into the flour mixture until the butter becomes the size of peas.12 tablespoons unsalted butter cold
- Add the butter to your bowl of dry ingredients and with your finger tips, mix the butter into the flour by gently rubbing them together
- When done, place your bowl in the freezer for 5 minutes.
- Now in a medium bowl combine wet ingredients (your egg, vanilla yogurt, 2 tablespoon of milk and vanilla) and mix well½ cup yogurt, 1 large egg, 2 tablespoon milk, 1 teaspoon pure vanilla extract
- Remove your bowl of dry ingredients from the freezer and stir the wet ingredients into dry ingredients until just combined(don't over mix). It will not look like a uniform dough at this point. If you can take a handful of the dough and squeeze it together and it stays in a clump, then you are ready to turn it out of the bowl for kneading. If it does not stay together, then add a tablespoon of milk at a time until it does.
- Now take your dough and turn it out on to a floured surface. Pull it all together into a ball. It will be shaggy.
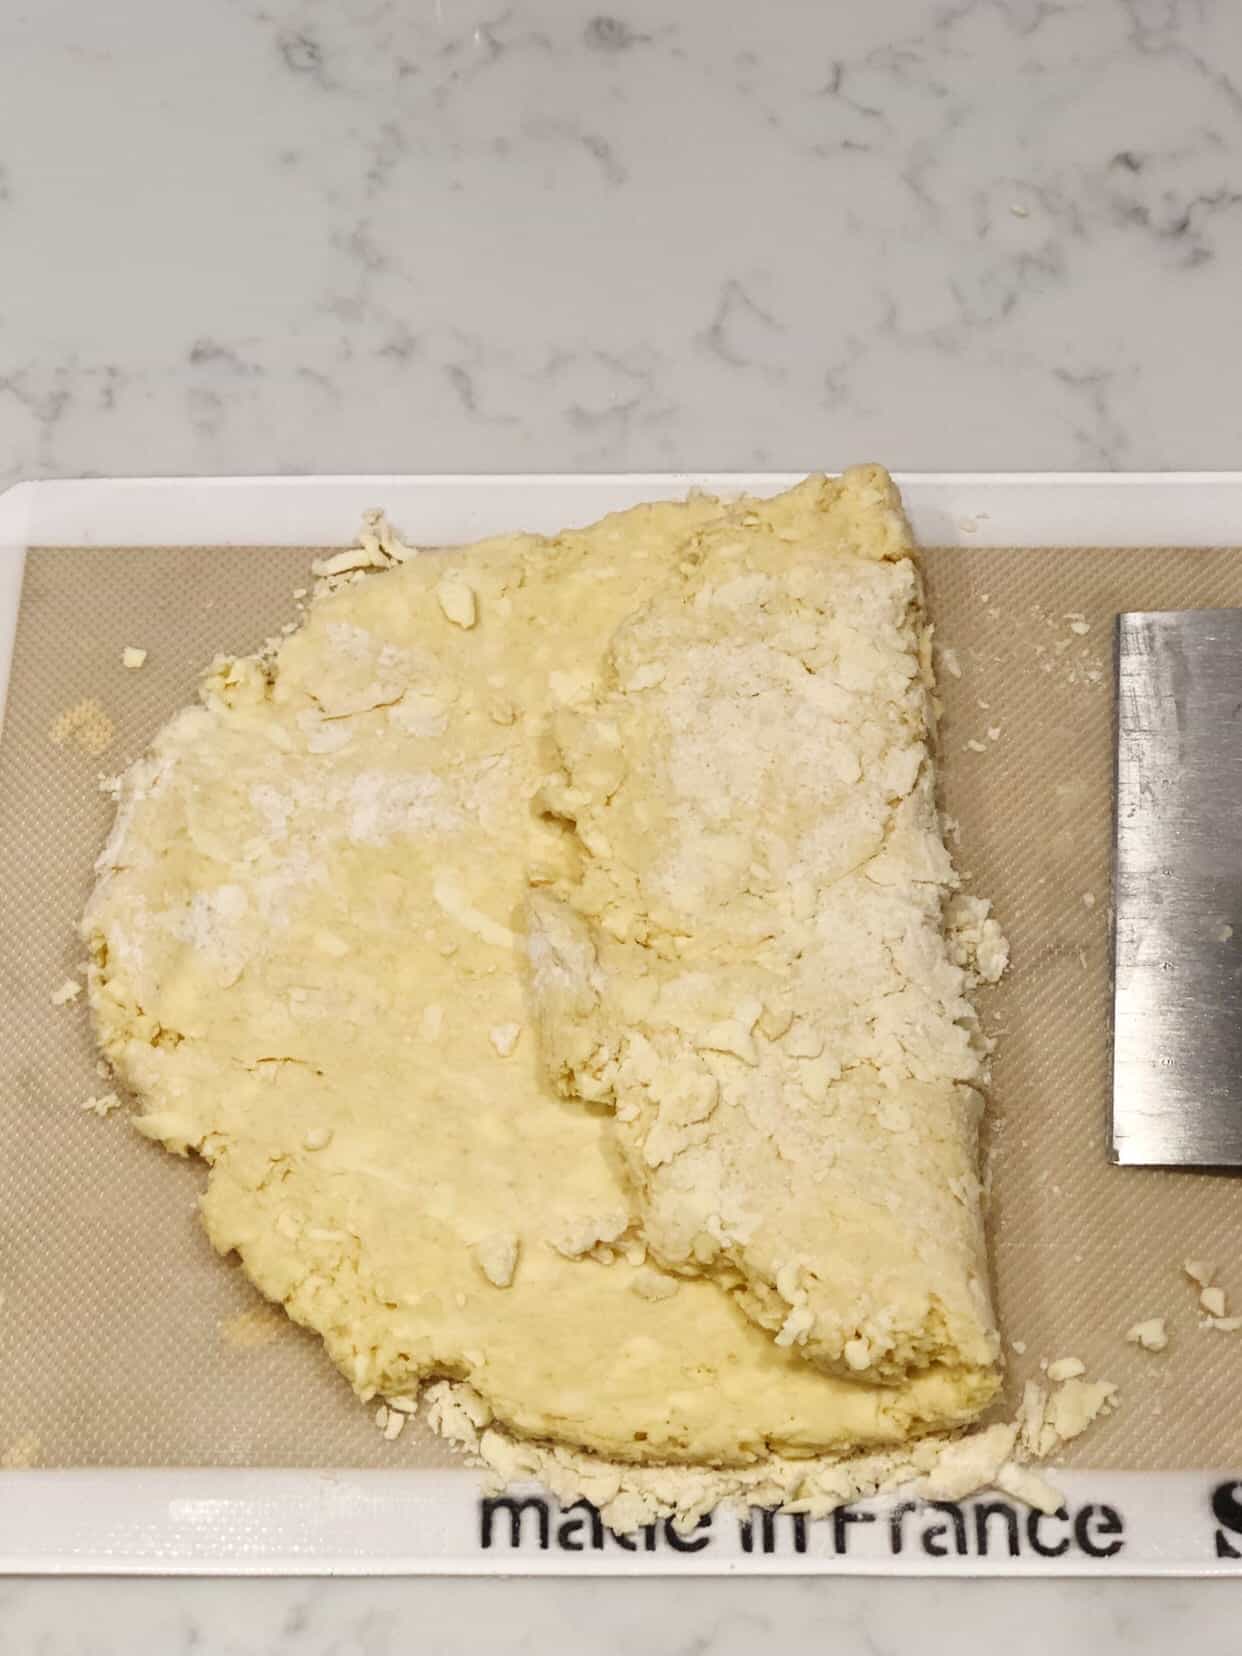
- Gently knead 3-4 times then pat it into a square shape about ½ inch thick. Now take one side of your square and fold it in towards the middle (like folding a business letter.) Do the same with the other side of your square so that both sides of your square have been folded in to the center.
- Now fold this in half and place into your bowl and freeze for 5 minutes.
If using a scone pan
- After 5-10 minutes, if you have a scone pan, grease the pan with some butter.
- Take your berries and gently fold them into the dough trying to not mash them and then place dough evenly into all of the slots and proceed to the topping instructions below.
If you are not using a scone pan
- Grease a baking sheet or add parchment paper to the pan.
- Turn out your dough onto a lightly floured surface and gently form into a ball and pat down (with a rolling pin, not your hands) until it looks more like a disc and not a round ball.
- Gently roll the dough until it looks like a rectangle and it's about ¾ inch thick.
- At this point, sprinkle your berries on top and gently press in to the dough until they are flush with the dough. Some may break but that is ok! Save some berries for adding to the top of the dough.½ pint of blueberries
- Now fold this dough in half and gently re-roll it to ¾ inches thick again
- You can either cut your shapes out of the dough with a knife (for triangles) or you can use a biscuit cutter. I recommend triangles to eliminate re-rolling the scraps.
- Place your scones onto your baking sheet.
Topping
- Take the extra berries and place on the top of the scones by gently pressing them in to the tops of your dough.
- Brush the tops of your scones with the milk or cream depending on what you are using and then sprinkle with some sugar (course is the best if you have it)
- Bake for 18-25 minutes or until they just start to get golden on top and bottom.
- When done, let cool on a wire rack for 10 minutes.
- Serve with coffee, tea or with some sweet butter on the side.
- Enjoy!
Notes
Freezing and thawing instructions:
To Freeze:
Let scones cool completely. When cooled wrap in plastic wrap and place in a freezer bag.Scones will last up to 2 months in the freezer.
To thaw the frozen scones:
Remove the scones from the freezer and take out of the bag (but leave plastic wrap on) and place on counter 1-2 hours before you are ready to eat them. You can also place the frozen scones in the refrigerator the night before and they will thaw overnight and be ready to eat in the morning.Nutrition
Nutrition Values are estimates only.
See full nutrition disclaimer hereTried the Recipe? We Would Love To Hear From You In The Comments Below!
Mary Valmas says
These are absolutely delicious. They do require some work ( kneading freezing, folding) but totally worth it- they are flaky and tender and SO good. The layers of pastry are heavenly !
Melissa says
love hearing that! 🙂
Mary Valmas says
These scones are delicious ! Buttery, moist and flaky. You can see the layers of deliciousness ! I’m making a second batch today. !
Melissa says
so glad you enjoyed them Mary! They do go fast in our house too 🙂
Ali says
So easy to follow and came out amazing!